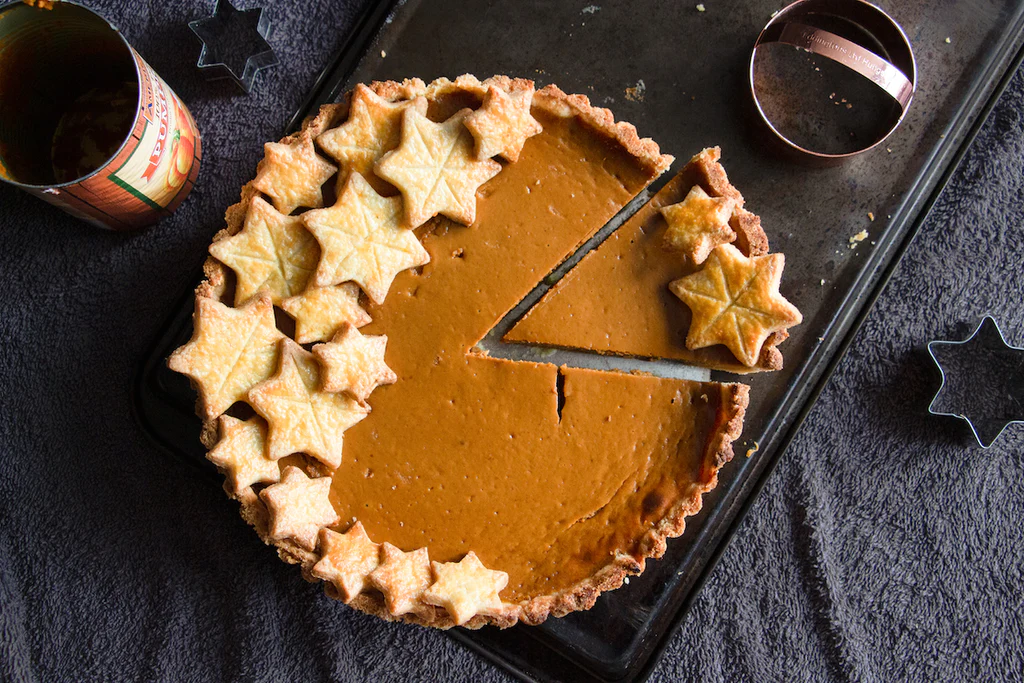
Seriously Delicious, Fool-Proof Pumpkin Pie Recipe
[[ recipeID=recipe-8lsc6vin7, title=Seriously Delicious, Fool-Proof Pumpkin Pie Recipe ]]
Autumn in a casing, our pumpkin pie recipe is the perfect crowd pleaser for the festive season.
Pumpkin pie is one of those foods that evoke autumnal coziness, and the spices make the whole house smell festive. I'd actually been looking forward to baking a pumpkin pie for a long time - last December I watched a Thanksgiving episode of Friends and decided I'd like to give it a go, but it was too late in the season and I couldn't get hold of tinned pumpkins (no, I didn't consider making my own pumpkin purée - one step too far!).
I've now spent a few weeks testing pumpkin pie recipes, and really, it can be as easy or time-consuming as you make it. The standard recipes (like the one on the back of my pumpkin tin) call for tinned pumpkin and shop-bought pastry - if you're happy to use those, the filling takes 15 minutes to make, so you could have a pie ready to eat in less than an hour.
Pumpkin - tinned or fresh?
I did a lot of reading around fresh vs. tinned pumpkin, and I PROMISE YOU that tinned pumpkin is the way to go. In baking, cooking temperatures and times hinge heavily on the ingredients used (as does the final texture of your bake), and fresh pumpkins will all be slightly different in moisture content, acidity, sweetness, etc. Tinned pumpkin is more reliable. Not to mention the faff - if you did want to use fresh pumpkins, the process involves baking, skinning and seeding, and finally blitzing the pumpkin to get a similar purée to the one you can buy in the tin.
Pastry - shop-bought or homemade?
This one is a bit of a no-brainer for me. Unless you're working with puff pastry - shop-bought puff is still pretty good, and the 48-hour process it would take to make some at home is unrealistic - I don't cut corners when it comes to pastry. I think hand-made, buttery pastry makes all the difference in the world to the pie tasting delicious. And, the pumpkin filling is easy and quick, so you should still be able to get everything ready to bake in under an hour.
I tested this pumpkin pie with a flakey pastry with a high-butter-low-sugar content (almost like what I'd use for a savoury quiche or meat pie), but found the flakey texture a little bit too greasy with the velvety sweet filling. After a fair bit of trial-and-error, I decided on a sweet shortcrust pastry - I'll write my own recipe for this at some point, but this recipe by Sainsbury's is a good option. It has a higher sugar content than a savoury flakey pastry (I actually thought it tasted amazing on its own!) and it's biscuity and really elevates the pie. Do blind-bake it before baking the final pie, as the base takes a little longer to cook than the filling.
Servings:
Keywords: Pumpkin, Pie, Baked Goods, Pastry, Seasonal, Thanksgiving